How to make your own rain barrel step-by-step.
How to Make a Rain Barrel in 5 Easy Steps. Last edited on September 20, 2023.
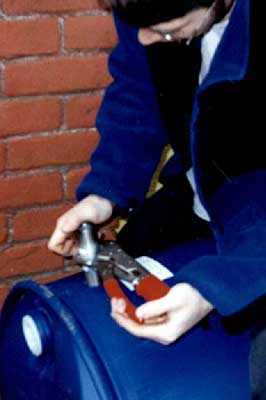
Step 1: Drill three of four holes in the barrel. One of these is for the bibet to connect your garden house to the barrel and the other fittings will allow you to add more barrels in the future. One of the barrels must have an overflow fitting near the top of the barrel. If you plan on using 3/4 inch fittings use a 1 inch hole saw to cut the holes. If you have an adjustable hole saw make it a little smaller than 1 inch.

Step 2: Place plumbers goop on a 3/4 inch nipple. Using a 3/4 inch galvanized metal nipple and some locking pliers, thread nipple into the barrel. the hole for the fitting. Place Plumbers goop or some other adhesive on the thread.
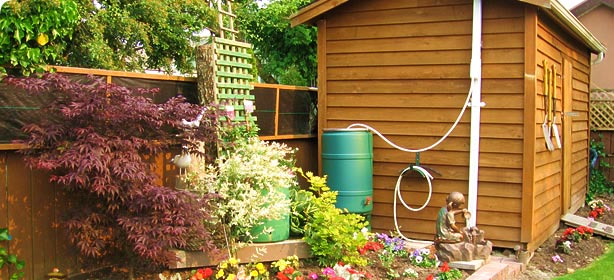
Step 3: Now the real fun part. Cut the down spout at the proper height. You should place the rainbarrel on one or two concrete blocks and then determine the proper height. After cutting the down spout attach the necessary elbows and extensions to have the down spout reach the barrel. I still am trying to create a non ABS or PVC way to divert the first couple of gallons after each rainfall (this will keep the sediment from clogging up the screen). Attach a 4 inch by 2 inch ABS plastic converter to the end of the down spout and attach a fine mesh screen over the converter (you can use a paint sprayer filter which you can get at a hardware store).

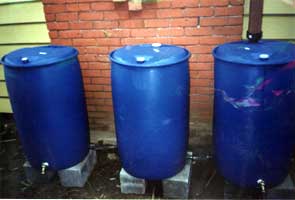
Step 4: If you are adding more barrels do this now. Attach a garden hose Y fitting on the 3/4 inch nipples. Position the barrels on top of the concrete blocks and cut the right length of garden hose to connect the barrels (with male fittings attached to both ends).

Step 5: The final product. You must attach an overflow line on the first barrel (the one on the far right in this picture). This must be placed near the top of the barrel and it should be attached to some form of hose or tube to discharge any overflow. Please note that you must remove one of the two bung fittings on the top of the barrel and cover it with a small screen. I used the paint sprayer filter with a rubber-band to hold it in place.
Further reading & source: http://www.rwh.in/howto.html
Rainfall (in.) x Collection Area (sq. ft.) x 0.6233= water discharged (gallons)
Additional Resources : https://www.bhg.com/gardening/design/projects/how-to-make-rain-barrel/
Easy to assemble rainbarrel using Garden Water Saver products (www.gardenwatersaver.com) Complete rain barrel construction kit: https://gardenwatersaver.com/product/rain-barrel-kit-3×4/
FREQUENTLY ASKED QUESTIONS – PDF format with hyperlinks

10 replies on “Rainbarrel Tutorial: How to make a rain barrel.”
Tips for using rain barrel
Saving rain water to use for watering the garden is a sustainable practice that has been around for ages. I recently saw the simplest form of rain barrel usage during my Grand Garden Show stop at Fort Michilimackinac (https://youtu.be/r5TOVe8Ix5k): simply placing an open barrel under a gutter. These days we can make or buy better rain barrels. One modern improvement is to cover them with mesh to screen out bugs and debris. Another great improvement is to drill holes and add fixtures which allow you to attach spigots and hoses to the barrel. These and other attachments make rain barrels easier to use.
Rain barrels can be connected to each other.
If you want to collect more water than one barrel can hold, you could join two or more rain barrels together with short hoses. Those short hoses came with my four rain barrels when I bought them. We connected one barrel to the gutter at the corner of our garage. As that one fills up, the water flows from it into the other barrels. The last barrel has a spigot which we can open and close to get the water out when we need it.
Use a diverter to connect the rain barrel to a downspout. A diverter will prevent water from overflowing when the rain barrel is full, and it will divert it back to your downspout so the excess water flows out where it should. It also makes it easy to detach the rain barrel each fall and reattach it each spring. I bought two diverters when I got my four rain barrels because I had planned to hook one of them up by another downspout that is closer to my front yard garden. However, we have not yet done that. When we do, I’ll make a video to show you how it’s done.
Position the rain barrel higher than where you want the water to flow. Instead of buying a special stand for our rain barrels, we use cinder blocks to raise them up off the ground. The spigot should be higher than your watering can or bucket. If you’re going to attach a hose to the rain barrel, then the barrel needs to be higher than the ground that you’re watering so that gravity will propel the water out to the other end of the hose. Another option—which I have not tried—is to get a pump
Find an easy way to transport the rain barrel water. You could simply attach a hose to the rain barrel and stretch the hose out to your garden to water it. However, keep in mind that the water flows out slowly from a rain barrel hose, so it will take longer to water plants this way than it does with a regular garden hose. I prefer to use a regular garden hose and soaker hoses to water my garden beds. While I’m doing that, I can use a watering can or—better yet—a rolling garden cart to water my containers (https://amzn.to/3nUbHsW). This cart holds more water and rolling it around is much easier that carrying a watering can back and forth. You can watch how my watering system works in this video: Watering Routine (https://youtu.be/Mm6jSra0dBw).
Be careful about using rain barrel water on edible plants. Due to possible contamination from roofs and gutters, I recommend the following precautions.
#1 Clean the rain barrel before you start collecting water in it.
#2 Water the soil only; do not get the plants wet.
#3 Stop using the rainwater a couple weeks before harvesting.
#4 Consider adding a bleach solution periodically to the rain barrels in order to lower the risk of contamination of edible plants.
I (Debbie Rea – The Gardener Wife) took that last recommendation from the “Best Practices and Recommendations” section of this extension service article (https://njaes.rutgers.edu/fs1218/) about a 2011 New Jersey study of rain barrel water quality. This study also recommends watering in the morning and not harvesting until later in the day.
Copyright Source: https://wordpress.com/read/blogs/132899449/posts/1151
Empty rain barrels before freezing weather. If water in the rain barrel freezes, the plastic fixtures will crack. Then the rain barrel will leak. I recommend doing this before your first frost alert. Remember how slowly the water drains out and plan ahead. If my four rain barrels are full, it takes several hours to drain them. So it’s a bad idea to start the night before freezing temperatures are expected. Rather than let the water drain out wherever, I direct it to where it will do the most good for my garden. This is the one time of the year that I attach a hose to my rain barrels, and I stretch the hose out to my trees. Then the trees get a nice soaking to help prepare them for the winter.
Clean rain barrels. It’s a good idea to clean the rain barrels after you empty them. The study mentioned above says to use a 3% bleach solution. Even if you live in a warm climate and can use your rain barrels year round, you should wash them out at least once a year. Be careful, as you turn the rain barrels over, not to let them land on those little plastic fixtures—that’s another way to crack them! If necessary, however, you can buy replacement parts (https://amzn.to/3GQ6UBG).
Secure rain barrels and store upside-down when not in use. I have found that it is best to store my rain barrels upside-down during the winter. This prevents melted snow and other debris from getting inside them. It’s also important to secure them well when they’re empty. Without water in them, the rain barrels could topple over in a strong wind. We just bought a nice new strap (https://amzn.to/3jZy8vK) to hold ours in place better. In the spring, we just have to turn the barrels over and reattach them to the diverter, and then they’re ready to use for another season of rain harvesting.
Copyright: Debbie Rea – The Gardener Wife. For more info on proper watering, see my earlier blog post, Watering Tips. https://thegardenerwife.com/2018/08/10/watering-tips/